Starting The
Terrain Editor
- Start
the Mission Editor by pressing F11.
- Start
the Terrain Editor by pressing F6.
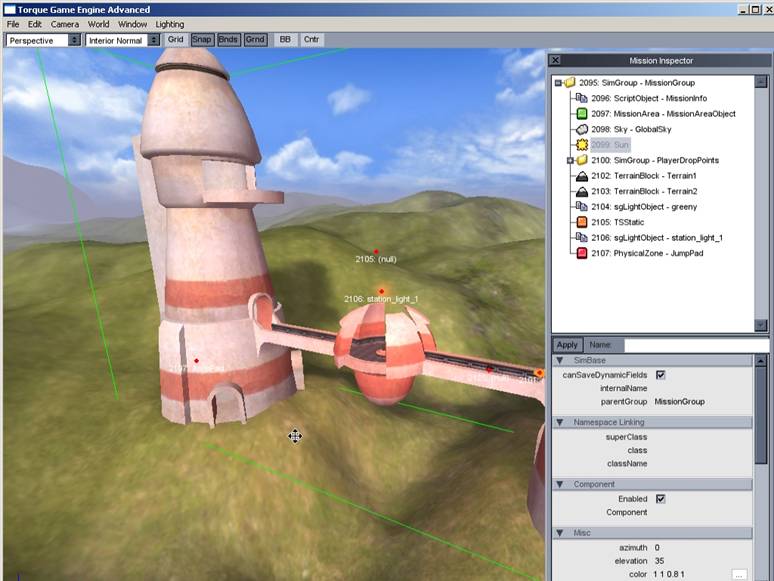
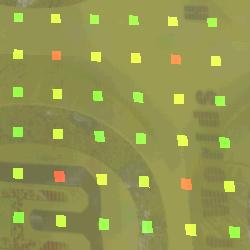
When
you start the Terrain Editor, you will see a shot like the one above. This
looks very much like the view in the Manipulator, for the fact that there are
no windows obscuring your view. However, if you look closely, you'll notice
some odd squares following your cursor around while you move your mouse. These
squares are yet another Torque user interface device, the purpose of which is
to give you feedback on what terrain area will be affected when you choose to
manipulate it and to some degree how it will be affected. Before we jump right
into learning how to edit the terrain, let us look at the other two devices on
the screen.
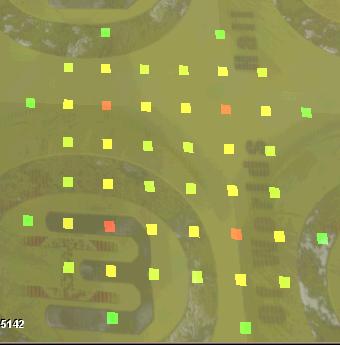
I'm sure someone will correct my naming,
but for now I'll refer to the text beside the label (Mouse Brush) as the Over Vertex Brush Scale. The purpose of
this scale is two-fold:
- It
shows how many vertices are currently under the brush. In the image above,
we have 69 blocks under the brush.
- It
shows the average elevation of the vertices under the brush.
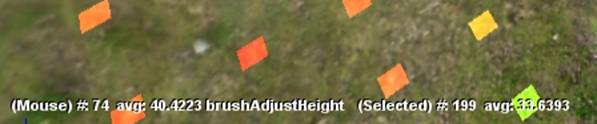
Again, I'm sure someone will tell me
my naming choice is incorrect, but for now I'll refer to the text beside the
label (Selection) as the Selected Brush
Scale. The purpose of this scale
is two-fold:
- It
shows how many vertices are currently selected.
(We'll learn about selecting below.)
- It
shows the average elevation of these selected
vertices.
There are two basic modes for editing
via the Terrain Editor:
- Brush
Mode - The default mode, which I like to think of as Brush Mode, is a free floating 9x9
vertex brush. You can adjust the shape and hardness of the brush as well
as change its size of by rough increments. In addition, this mode provides
several operations.
- Selection
Mode - The second mode, which I use less frequently, but which can do
things that you cannot do in Brush Mode, is what I like to think of as Selection Mode. In this mode, you
select arbitrary blocks of terrain. Then, you can perform a single
operation upon them, which is to modify their height via mouse movement.
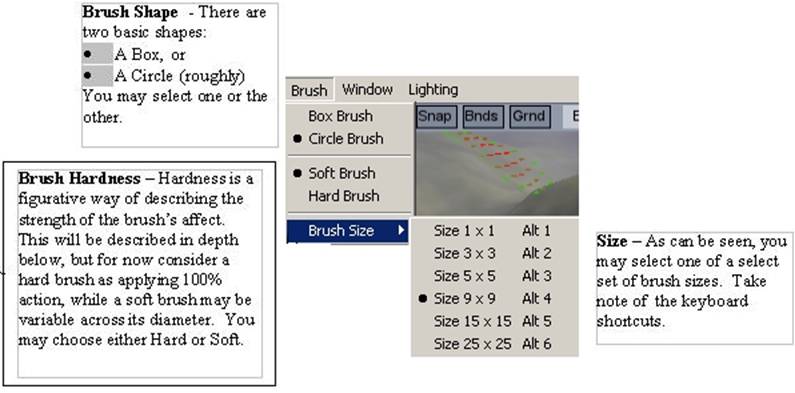
I think it is fair to say that most of your editing is going to be in Brush Mode, and because it is the default mode, I'll discuss it first. As mentioned previously, you can modify the brush shape, hardness, and size. The illustration below describes the details, which are modifiable in the Brush Menu.
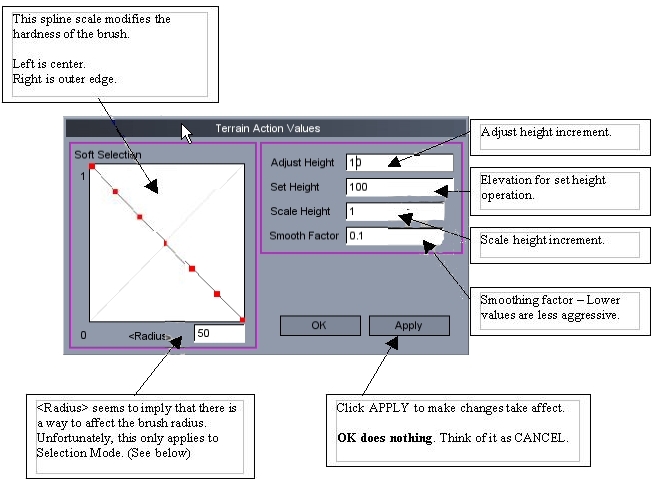
OK, now that we know about basic
brush manipulation, what about the operations? Let us take a look at the action
menu on the next page.
|
|
|
||||||||||||||||||||||
|
|
|
Alright, so what
about this other mode, Selection? There isn't
really much to it. To get into Selection
Mode, just open the action menu and click Select. Now, you can select terrain as
follows:
OK, now that we know about basic
brush manipulation, what about the operations? Let us take a look at the action
menu on the next page.
|
Action |
Result |
|
Previously Unselected Vertex |
Selects vertex. |
|
Previously Selected Vertex |
May increase strength of action (see discussion of brush
hardness below) if the selection cursor has a stronger value than currently selected
vertex's action strength. |
|
CTRL +
Previously Selected Vertex |
De-selects vertex. |
Having selected the terrain blocks
that we wish to modify, we can open the action menu and click Adjust Selection. Now, we can right-click
and drag up-down to raise-lower the elevation of the selected blocks.
To leave selection mode, select any
other operation in the action menu. Also, once selected, vertices stay
selected, regardless of mode. If you wish to de-select all selected vertices
press CTRL + N or click Select None in the Edit menu.
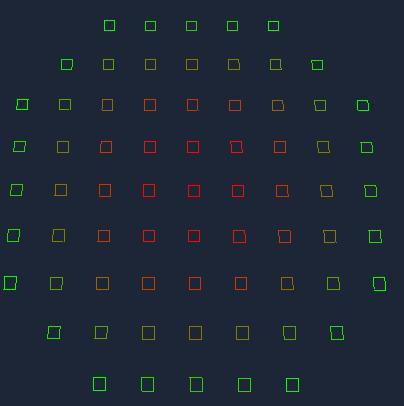
Brush hardness has been mentioned
several times but not completely explained. When the brush hardness is set to
Soft, the action strength along the diameter of the brush can be modified. In
simple terms, if the strength of action is set low, then the value change for
that part of the brush is also low. Vice versa, if the strength of action is
set high, the value change for that part of the brush will be high. This
attenuation is in relation to the movement of the mouse. The brush gives
strength of action feedback through coloration. Brush coloration is a
continuous scale from RED to GREEN. You can manipulate this hardness in the
Terrain Editor Settings dialog found under the Edit Menu.
|
Color |
Relative Hardness (Strength of
Action) |
|
RED |
Hardest (100%) |
|
|
Hard (more than 50%) |
|
YELLOW |
Soft (less than 50%) |
|
GREEN |
Softest (Almost 0%) |
For example, the brush below is hard in the middle progressing to soft on the edges.
Earlier, I deferred a discussion of these settings. Now is the time to understand them. In addition to being able to adjust brush shape, hardness, and size, the Terrain Editor Settings Dialog, found under the Edit menu, gives us some additional control.
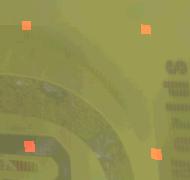
I had a bit of difficulty
understanding Radius when I was
learning about the engine. So, instead attempting to explain it with words,
I'll give a pictorial example that should clear it up. In the following
sequence, I have changed to Selection-Mode and am using a 1x1 brush. I then
selected a single vertex and then opened the Terrain
Editor Settings dialog.
|
|
Radius = 1
APPLY |
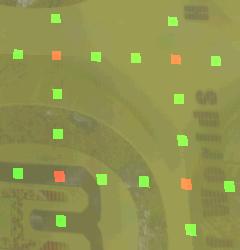
|
|
Radius = 8
APPLY |
|
|
Radius = 12
APPLY |
|
|
Radius = 16
APPLY |
A
new feature has been added to the terrain system for TGEA: MegaTerrain. MegaTerrain is an extension of the TerrainBlock object which allows it to seamlessly stitch together and edit 4 TerrainBlocks. It is still
possible to create a single terrain block that tiles infinitely, or use Atlas
terrain. Now, unlike the previous Legacy
terrain, you can create new terrain blocks as easily as you would create a
Precipitation object or StaticShape. Not only that, but the Terrain Editor
tools have the same effect on the newly added Terrain block. All you need to get started is a height
field image and a terrain texture.
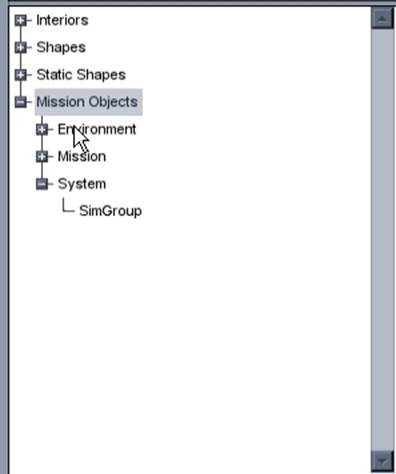
Step 1: Press [F4] to open the World Editor
Creator. Click on the Mission Objects to expose its
contents.
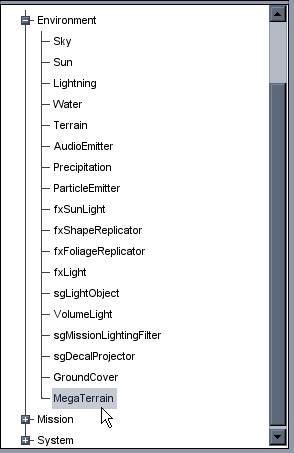
Step 2: Click on Environment to show the environmental
objects you can place. Scroll down
until you see the MultiMap
object.
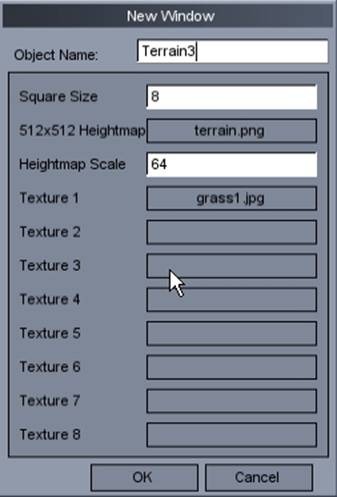
Step 3: Click on the MultiMap to
display its creation dialog. Name
it Terrain3, or whatever you feel best suits your preferred naming convention.
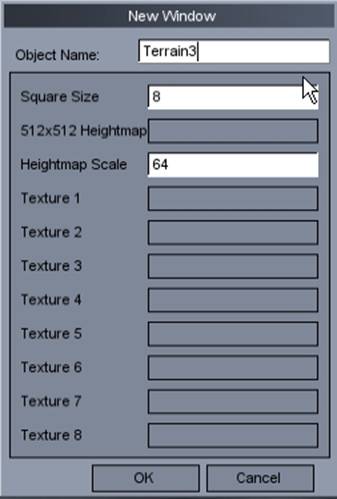
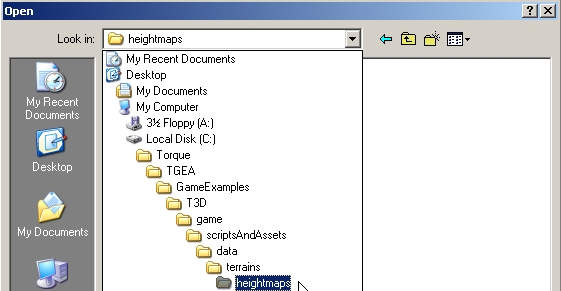
Step 4: Click on the 512x512 Heightmap
box. When the file browser appears,
navigate to where you keep your heightfield
texture. The path shown in the
following screenshots are based on the T3D
file system. Click on your terrain
texture and click Open.

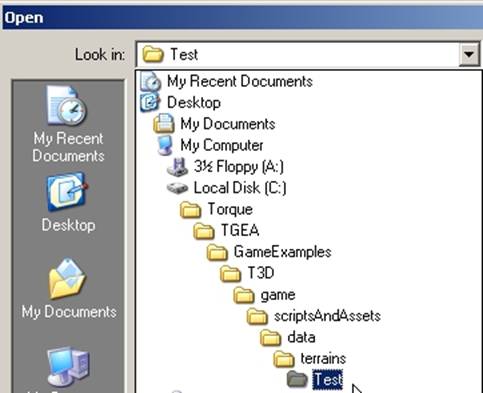
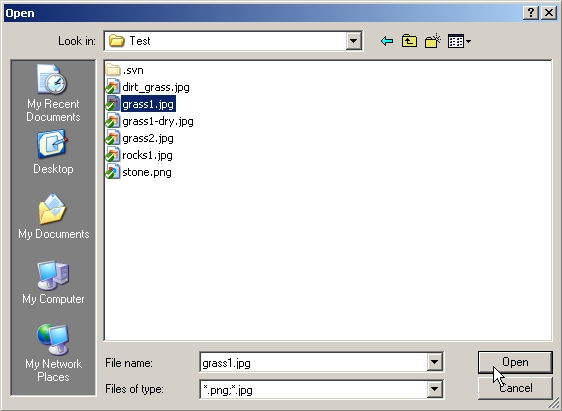
Step 5: From here, you can
choose ground textures that will be loaded with your heightfield. For now, let’s just pick one to
keep things simple. Click the Texture 1 box to bring up the file
browser. Navigate to the folder that
you keep your ground textures.
Select a texture, then click Open.
Step 6: Double check your
parameters. You can compare your
data to what is shown in the following screenshot. When you are happy with parameters,
click [OK].
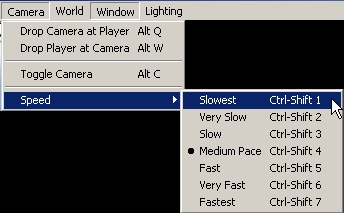
Step 7: The heightfield may be generated above you, so make sure you
are in the free flight camera (Alt+C). Fly
upward and look for it. If you are
having a hard time spotting it, click on its member in the World Inspector
dialog. A green outline around the
terrain block should appear. Now,
you can move the entire terrain around until it lines up with your existing
terrain system. Be sure to relight
your seen (full relight). Start
editing, and enjoy this awesome new feature!